
Video tutorial transcript:
Introduction
Hello, and welcome to this short video introducing items campaigns with the dynamic source option.
This video demonstration will familiarise you with items campaigns, specifically how to set up the option to dynamically source products from your catalogue in the Merchandising studio.
Please be aware that test data is used throughout this demo, and you should refer to your own data sets when applying this functionality.
What are dynamic source items campaigns?
This option allows the automation to group products based on your attribute data and product ID's that have been provided.
In order for the desired products to be grouped, we must receive attribute information for each product with a list of ID's of products that are associated.
Let me show you how to set up a dynamic source items campaign in the merchandising studio.
The demo scenario is to show 3 Sony products that have been associated with each other within my data set. This campaign will only show when a shopper lands on a Sony Camera.
How to demo
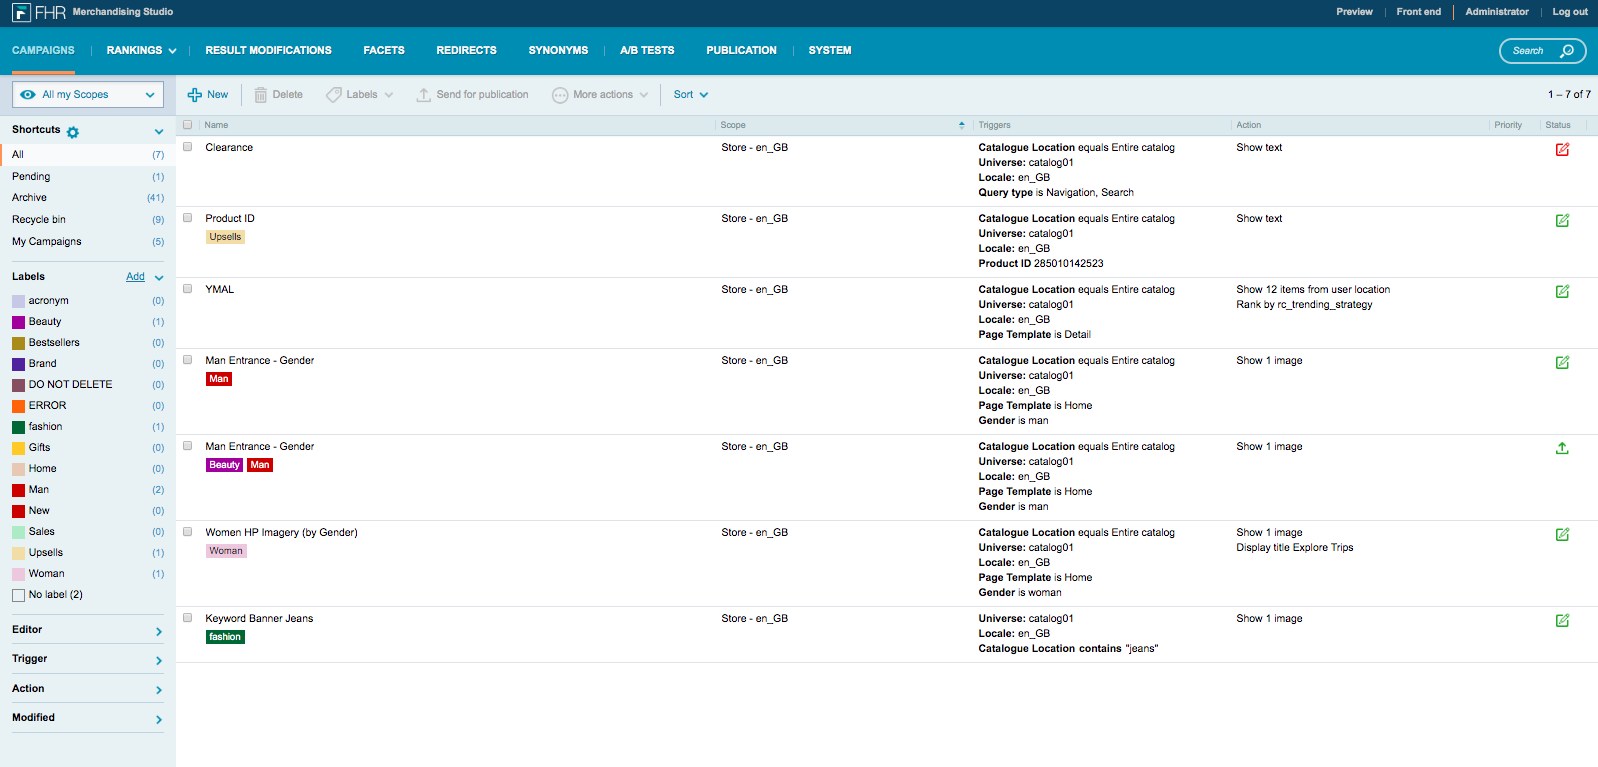
Using your credentials open your Merchandising Studio. This will open on the campaigns tab by default:
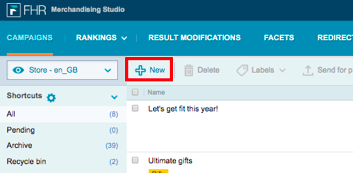
Next … Click on new:
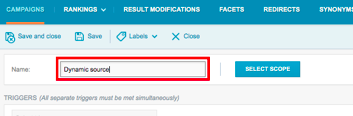
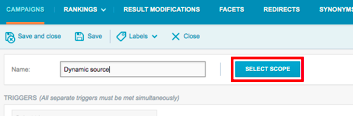
Let’s call this campaign … Dynamic source:
The attribute data has been configured to link Sony cameras with related accessories.
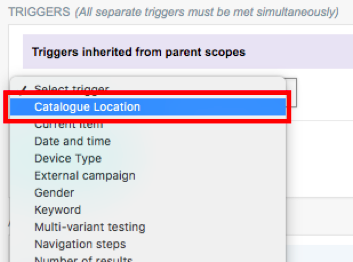
Click SELECT SCOPE and choose the scope:
For this scenario, we’ll need to set up a user location, as we want the campaign to trigger when a shopper views a Sony camera:

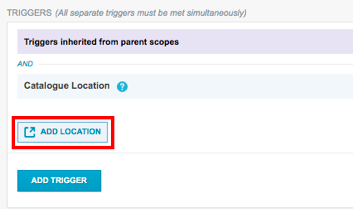
Next, I need to choose the location, so click on ADD LOCATION:
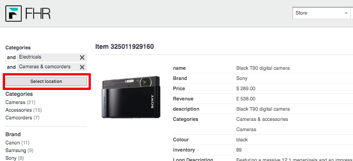
I am now in the preview site, where I can navigate to the camera where I want this campaign to trigger.
Navigate to Electricals>Cameras & Camcorders and choose the Black T90 digital camera and click SELECT LOCATION:
Scroll down to action; you’ll see that 'Items' is already selected as default. Next, change the number of items from 1 to 3.
Change the items from to 'Dynamic source' and choose 'Similar items':

Note that options available in this drop-down will have been set up specifically for you – so your options may differ here.
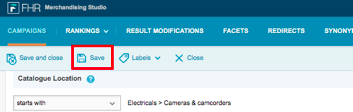
Check your campaign configuration is accurate and click Save:
To check the campaign is firing correctly, check the preview site.
So, let’s navigate to the camera first ...
Great we can see the campaign is displaying as we’d expect.
And let’s just make sure it’s not firing anywhere else, so I’ll choose another category to be sure, like a mens category …
If you are happy with the campaign, then send it for publication:

Once the campaign is published it will be live on your site following your cache process.
Best practice
A few best practices to remember with regard to campaigns:
- Use the date and time trigger to set up campaigns in advance.
- De-active or archive campaigns that are not currently in use, which you can reactivate and publish at a later date (annual/seasonal events).
- Add appropriate labels so you can easily find campaigns.
Thank you for watching this demo video, we hope you have enjoyed this quick introduction to items campaigns.
Please do not hesitate to contact us should you have any questions, use this link to raise a ticket.
Your feedback is important to us, please take a moment to let us know if you found this article helpful by clicking "Yes" or "No" in the "Was this article helpful?" section below or by adding a comment.
Comments
0 comments
Please sign in to leave a comment.